 |
| BushcraftZ 2014 |
Materials:
- 500ml plastic bottle
- 25 cm zipper
- Fabric remnant or ribbon remnant
- Clear drying craft glue, craft knife, measuring tape, scissors, needle and thread matching the colour of the zipper, a hand full of pegs.
 |
| BushcraftZ 2014 |
Method:
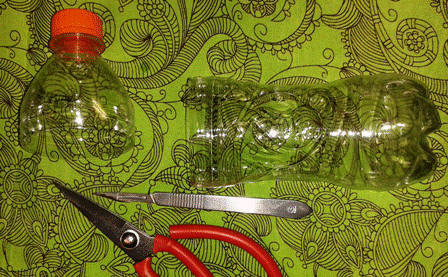
- Hold a pencil next the plastic bottle aligning at the base of the bottle and mark the cutting line 2-3 cm from the tip of the pencil.
- Cut the top from the bottom of the bottle with a craft knife
or scissors taking care to cut in a clean straight line right around the
bottle.

BushcraftZ 2014 - Measure the circumference of the bottle with a measuring
tape and add 3.5 cm to this measurement. Use this measurement to trim the
zipper at the ‘closed’ end if necessary.

BushcraftZ 2014 - Form a circle with the zipper overlapping with 1.5 cm and
close the circle with a few stitches. Cover this link with a ribbon or a piece
of fabric remnant to form a string hinge. Ensure that the zipper is able to
unzip properly to enable to pencil care top open up. Also check that the zipper
circle fits over the bottle opening at the cut line on both pieces.

BushcraftZ 2014

BushcraftZ 2014

BushcraftZ 2014 - Liberally apply clear drying craft glue on the rim of the
base of the bottle and slip the zipper circle over the bottle carefully align
the zipper in such a way the one is still able to open and close the zipper.
Secure the position of the zipper with a few pegs and allow to dry. Once the
glue has dried, remove the pegs and repeat the process by attaching the other
side of the zipper to the top part of the bottle. Again allow to dry well. The
basic pencil case is now completed

BushcraftZ 2014 
BushcraftZ 2014 - Optional: Decorate the pencil case further with ribbons and/or other decorations.
No comments:
Post a Comment