 |
| BushcraftZ 2013 |
Materials:
Left over knitting yarn and suitable knitting needles
50 cm x 50 cm cotton fabric
2 x 20 cm zippers
2 x magnetic buttons and large buttons (optional)
General sewing equipment
Method:
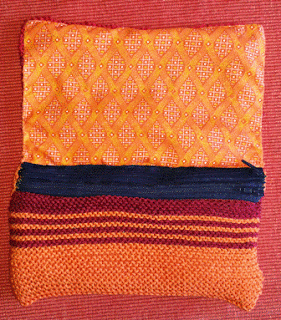
- Knit a rectangle of approximately 29 cm x 21 cm.

BushcraftZ 2013 - Fold the knitted rectangle 1/3 from the bottom and sew the
sides together to form a pouch.

BushcraftZ 2013 - Determine the dimensions of the pouch. Use these to calculate the size of the cotton lining for the pencil case. Add 1.5 cm seam allowance to all sides. DIAGRAM
- Cut out: 1 x panel A and 3 X panel B from the cotton lining.

BushcraftZ 2013 - Place the two zippers right side together and place the zippers between two B panels also facing right side together. DIAGRAM
- Use the zipper foot of the sewing machine and
sew along the outer edge of the zippers to join the two zippers and two B
panels. Turn right side out. The zippers should now lie next to each other with
the panels in between.

BushcraftZ 2013 - Join the third B panel to the one free zipper edge. Then place all three B panels on top of each other and ensure that the edges align. Pin the together to prevent to hold them in place.
- Position the B panels onto panel A aligning the edges. Mark
the position of attachment for the remaining zipper edge and sew into place.

BushcraftZ 2013 - Sew along the edge of the B panel to attach them to the A
panel and close the pouch.
- Place the lining onto the knitted pouch. Use hand stitching
and work along the open edges to attach the lining to the knitting.

BushcraftZ 2013 
BushcraftZ 2013 Optional
Insert magnetic buttons into the flap and pouch. Sew large
buttons onto the outside of the flap to hide the magnetic buttons.
 |
| BushcraftZ 2013 |

No comments:
Post a Comment